

This post is part of Purse Palooza 2012.
For full schedule of guest post pattern reviews and prizes, click here!
Kelly from Kelbysews is in the midst of hosting a fun quilt along on her blog called My Precious Quilt Along. Basically, you use your most-loved and most-hoarded fabrics to create something wonderful and be eligible for prizes! There is still time to jump in on the action for July and August…check it out!!
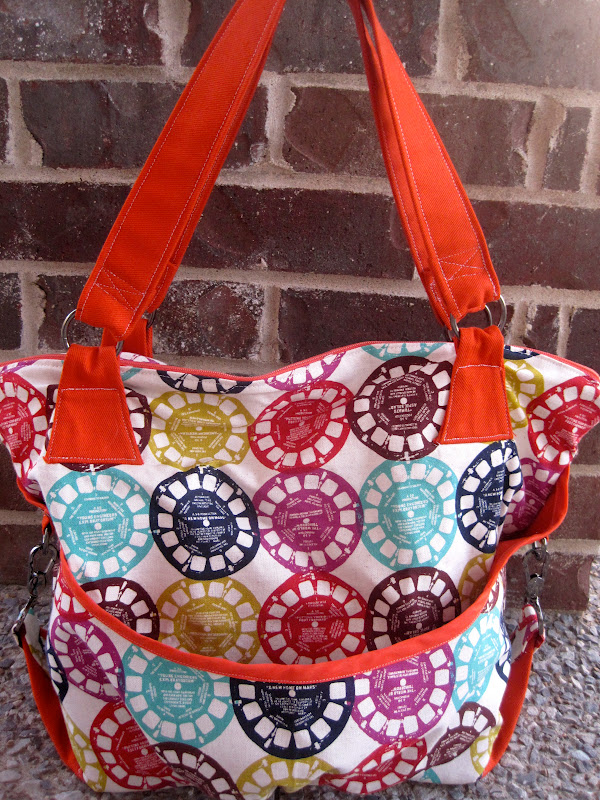
Hi! I’m Kelly from Kelbysews and I’m a bag-a-holic! I typically make a new bag anytime I go on a trip……or if I just feel like it. I LOVE making bags! Today I’m reviewing the Paris Bag by Pat Bravo. I chose this bag because I knew it wasn’t going to be a walk in the park–I love a challenge!
Materials Required
1 yard Exterior Fabric
1 ⅓ yard Lining/Contrast Fabric
1 yard Muslin Underlining Fabric
1¼ yd Heavy Weight Fusible Interfacing (22″ wide) or ⅔ yd Fusible Fleece (45″ wide)
⅓ yd Medium Weight Fusible Interfacing (45″ wide)
Mat Board (optional) hard bag bottom insert 8½×11″
22″ non-separating zipper
9″ non-separating zipper
4 metal rings (1½” wide)
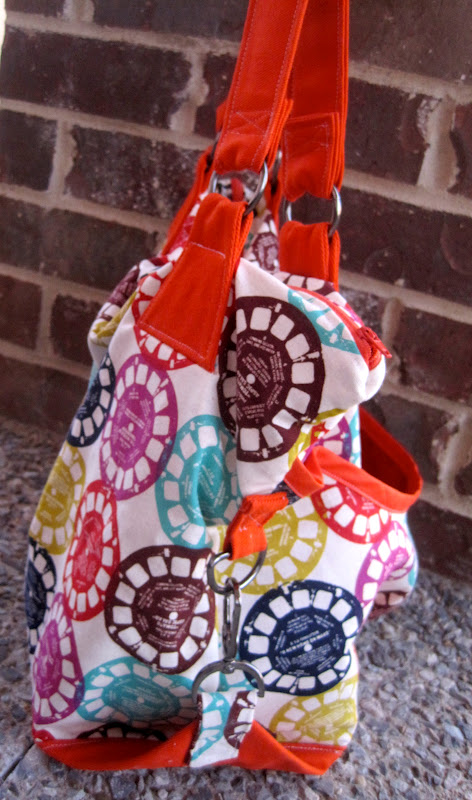
2 metal swivel hooks (⅞” wide) or snap hooks for side
2 metal “D” rings (⅞” wide)
Since I did not use quilting cottons, I made some adjustments with interfacing–I used Shapeflex on all my exterior pieces and pocket pieces ONLY. My lining fabric was so heavy that I didn’t feel the need
to add interfacing.

Fabrics Used
For this bag I chose to use a Melody Miller viewfinder print for the exterior. This is a linen/cotton blend so it’s a bit sturdier than quilting cotton. I like using slightly heavier weight fabrics for bags because they hold up better over time. I chose an heavier weight orange cotton/canvas fabric from my local craft store. I wanted something durable for the straps and the lining that would also help the bag keep its shape.
Pattern Pieces
There are only 4 pattern pieces and they are full size–no taping, hooray! The only down side is that the pattern sheet is two sided–so if you cut everything out on one side, you’ve destroyed the pattern piece on the other side. I cut out all the pieces on one side anyway because there was only one large piece I was destroying and I simply measured it beforehand to get the dimensions.

Illustrations/Instructions
This is, hands down, my most favorite pattern booklet! There are pictures to to accompany all the steps and plenty of written instruction so you know what you’re doing. It’s like a mini-book, not a creased, gigantic piece of paper you have to figure out how to refold. LOVE LOVE LOVE the pattern booklet. I can’t stress this enough. Seriously, Pat Bravo = genius pattern booklet design and instructions! Now if only all other designers would package and detail their instructions this way!
- If you’ve never done an interior zippered pocket before, these are the instructions for you! So easy to follow!
- The only instruction I found unclear, or wish was shown in more detail, is attaching the fabric that holds the swivel clasp to the exterior. You have to do this THROUGH the hole you leave in the lining. This isn’t much fun. I sort of wish they would made a bigger deal about leaving a big hole in the bottom of the lining because you’re going to need it in order to manipulate the bag to attach the swivel clasps.

Modifications
Sorry kids, but I can’t help myself. I’ve made lots of bags and I like to tinker with the pattern a bit. Here are the changes I made:
- I used a heavy weight lining and exterior, so I opted not to use the interfacing suggesting. I used ShapeFlex on my exterior and pocket pieces.
- Also due to the heavier weight of my fabrics, I did not add the muslin underlining.
- I cut my handles 6″ wide and essentially made double fold binding WITHOUT interfacing. I like my handles a bit wider and I didn’t need interfacing with the fabric I chose.
- I used pre-made bias binding to finish the top of the exterior pocket instead of making my own. I hate making bias binding so whenever I can buy pre-made, I do. Luckily, I found one that matched!
- I didn’t secure the gathers on the front pocket until I matched my pocket and exterior pieces. This is just common sense to me and I don’t know why the instructions tell you to secure gathers before you make sure the pocket piece matches the width of the piece you’re attaching it to.
- I made my drop pocket from exterior scrap fabric instead of from my lining. I like a bit of contrast in my pockets, otherwise they blend into the lining.
- I only divided my drop pocket into 2 sections instead of 3. I found the pocket size more useful when there are 2 larger compartments
- I added top-stitching to either side of the main zipper opening BEFORE I sewed the lining and exterior pieces together. In other words, when the exterior pieces and interior pieces are still loose, but attached to the zipper only.
- I did not add the hard bottom insert, which is optional

Difficulty Level
This isn’t for the faint of heart. While the instructions are good, there are lots of techniques utilized for this bag. I would classify this as advanced, or confidant intermediate. If you’ve made a few bags and feel pretty good about your ability to follow instructions, but you know when and how you have to make changes, then you can tackle this bag!
Conclusion
I learned a great deal from making this bag. I’m not sure I would make this exact same bag again, but I will definitely be using some of the construction methods in future bags.
- I loved using the hardware and how it adds some polish to a handmade bag.
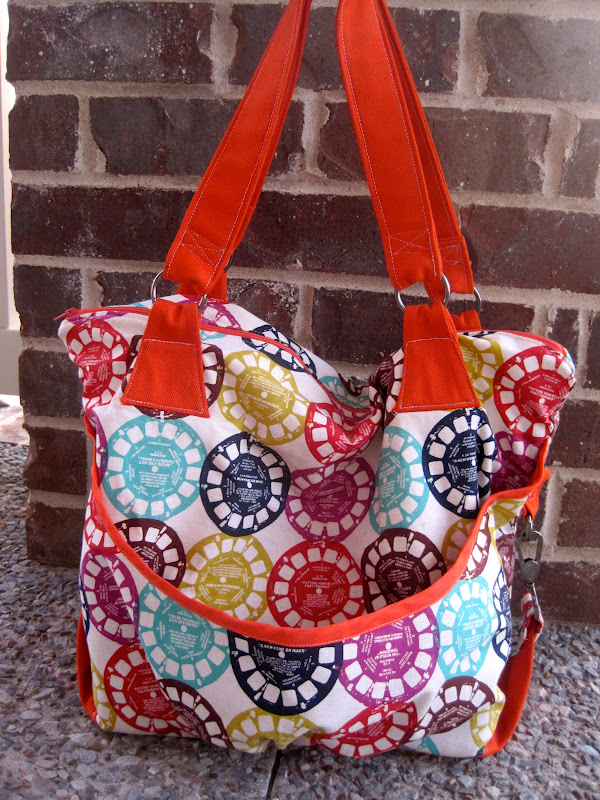
- I really feel the front exterior pocket is worthless. It’s too short (dips low) and the gathers make it stick out too much. Anything you put in there would fall out! I think if I made it again I would either make the pocket finish higher up, or eliminate the gathers.
- While I think using a heavier weight exterior and interior was, in general a good idea, it made sewing the hardware pieces extremely difficult. I would probably opt for a lighter weight fabric for the pieces that hold the hardware (other than the purse straps). I had to use a size 16 needle to even make a dent and my stitching doesn’t look so hot on those pieces. Major bummer.
All in all, the Paris bag is cute with lots of fun details and is perfect for everyday use! It isn’t overwhelming, but you can certainly cram a fair amount in it!
Thanks for having me Sara! I hope you all are enjoyed Purse Palooza as much as I have!


I thought that same thing about the Pat Bravo pattern I followed- such a clear and beautiful presentation. I loved it! Your bag looks great with those viewfinders, one of my all-time faves
Thanks for sharing that it isn’t the easiest bag to make…I really do love the fabric, so many colors this bag would go with everything!
Awesome bag! Love all the extra bits you shared about it too – thanks!
Love love love the purse and so want those fabrics! Your choices were great! Thanks for the tut. I’m not confident anything but I’d sure love to tackle this purse! [email protected]
Pretty one!
Great review xxx
Thank you for all the details on making this bag.
Great review ~ can’t tell you how many bags I’ve made that turned out not so great. This month of Purse Palooza has been wonderful!
Love your bag! I probably won’t be making this one, but I did learn that I need to buy some actual hardware when I make my purses instead of just using velcro or some other cheap alternative!
Love your detailed, honest review! And the bag is super, too. It’s very helpful to read how someone else has fared while making the bag. Thanks for your contribution to the wonderful Purse Palooza!
we are manufacturers of fashion bags from india you can order us or any help
[email protected]